
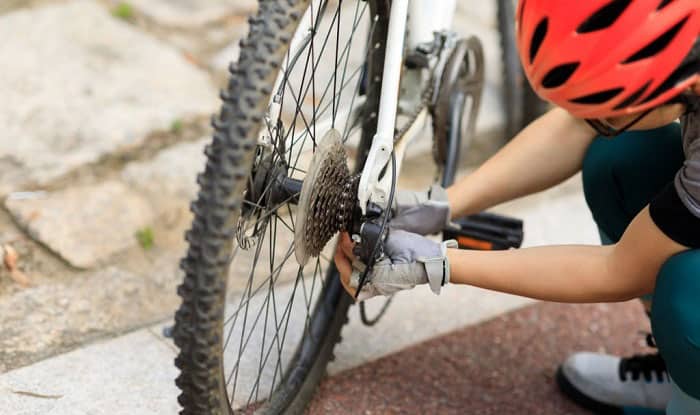
Chains slipping off is one of the common problems you encounter when cycling. Sooner or later, you will have the chain on your bicycle come loose and come off even while you are on the road.
Of course, you can always take the bike to an expensive repair shop and leave it to the bike repair professionals. However, as a responsible bike owner, it would be better if you could put a chain back on a bike yourself. So, without wasting much time, let’s explore how to put a bicycle chain back on.
For a quick look, our guide covers two methods:
- Replacing a Missing or Broken Chain
- Replacing a Slipped Chain
Replacing a Missing or Broken Chain
Necessary Tools
- A new bike chain
- A chain breaker tool
- A bike stand
- Master link pliers
It is easy to buy these tools at your local bicycle accessories store. However, do not forget to consult the seller to receive a suitable bicycle chain.
Step 1: Prepare Your Bike and Assess the Damage
Placing the bike on the bike stand properly. It allows you to work with your bike easier. Alternatively, you can turn your bike upside down so that it rests on the saddle and handlebars.
Next up, look for a break in the chain. If it’s hanging loosely from the sprocket, you should be able to easily find the two separate ends of the chain. If the chain has completely fallen off, just start putting on a new chain.
Step 2: Removing the Broken Chain
If you have decided that your chain needs to be replaced, the first thing you need to do is remove the old chain. If your chain is completely broken, all you need to do is turn the pedal until the chain comes off the sprocket completely.
On the other hand, if your chain is still holding together, you will need a chain tool to remove it.
Notes:
- Chain with the quick link: The quick link (master link) allows you to remove the chain easily and quickly. With master link pliers, you can remove your chain in a twinkle.
- Chain with “normal” links: If your chain doesn’t have a master link, you can remove it with a chain breaker tool.
Step 3: Thread Through the Rear Derailleur with a New Chain
It is essential to properly thread the new chain through the rear derailleur for safe and smooth cycling.
Hold the “female” end (the end without a pin sticking out) of the new chain, thread it around the bottom pulley, and then around the top pull. Your new chain won’t touch anything but the pulley if you do this correctly.
Once you have correctly threaded the replacement chain through the derailleur, pull it up and thread it through the smallest sprocket in the rear cassette. You need to thread your new chain through the front derailleur and turn the pedals. Once your replacement chain is correctly threaded through the entire gear system, connect its two ends and return to cycling. Again, you will need the chain tool to do this. Check out this video for a better understanding. Occasionally, your chain will slip off its orbit. In this case, it does not require special maintenance. If your chain is still routed through the gear and derailleurs system, you need to slide your chain back onto the sprocket. If your chain is jammed between the frame and the rear sprocket, you need to loosen the chain from the rear wheel. To do this, you have to loosen your quick release on the rear wheel and then screw the wheel’s nut. Keep loosening the rear wheel until you can pull the chain out. Notes: If your bike comes packaged with a rear derailleur, loosening the bike chain should be as easy as pie. What you need to do is loosen your chain and then thread it around your front sprocket. Specifically, you need to push a small lever located at the center of the rear wheel. At that time, your bike chain will slack. Next, run the other end of your bike chain around the front sprocket. After that, release the lever on the rear derailleur. Make sure your chain is tight! If your bike doesn’t have a derailleur, the only way to get your chain back is to turn the pedals. Start by hooking the chain to the rear sprocket. Then, hook as many links as possible onto the top of your front sprocket before slowly turning the pedal backward. Pedal forward slowly until the chain pedals smoothly. If your bike is a fixed-gear model, you must not do chain slippage. Instead, you need to slide the wheel rearwards before cycling again. Last but not least, after you’ve put the bike chain back on, you should cycle at a slow speed to inspect your bike chain. Check out this video for a better practice. No matter how good your bike chain is, there are times it falls off, and you need to put it back. Here are the main reasons why it slips off: Over time, your bike chain will lengthen. The more you use your bike, the faster the chain will lengthen, and it is normal. If the chain doesn’t fit your bike, it will soon fall off. In this case, it is essential to shorten your chain by removing some of its links. This is the most common cause of your bike chain slipping. Therefore, all you need to do is determine which part of the chain may be loose. In most cases, a bicycle chain has four main parts, including: You need to check out these four parts. In this case, you need to replace it so that your bike can perform better. What’s more, you can prolong the lifespan of your chain with regular oiling and routine maintenance. To put a chain back on a mountain bike, follow these six steps: Most shops charge $15 to $20 to get a bike chain back on. But you always have an easy option that is to buy a chain tool for $10 to $50 and do it yourself. In most cases, the master link (quick link) is darker or lighter compared to the rest links of the chain. Also, it is usually wider than the others. This link sometimes comes with a dart or arrow on it. As outlined above, putting a bike chain back on is not as complicated as many people think. Instead, it is a simple process that takes a few minutes to complete. Hopefully, you can get a chain back on a bike yourself without professional help through this guide on how to put a bicycle chain back on. This allows you to save your time and budget. Finally, if you have something in mind, don’t hesitate to share it with us by commenting. We would love to answer your questions. Please share it with other bike owners so everyone can put to use our helpful guidelines.Step 4: Weave Your New Chain Onto the Rear Cassette
Step 5: Thread the New Chain Through the Front Derailleur
Step 6: Attach the two ends of your new chain
Replacing a Slipped Chain
Step 1: Identify the slippage
Step 2: Fix Jammed Chain
Step 3: Loosen the Bike Chain if Your Bike Comes with a Rear Derailleur
Step 4: If Your Bike Doesn’t Have a Derailleur, Just Turn the Pedals
Step 5: Inspect the Bike Chain
What Causes Slip on Your Bike?
1. Your Chain Is Very Long
2. Loose Part
3. Your Chain Is Worn Out
Frequently Asked Questions
1. How to put a chain back on a mountain bike?
2. How much does it cost to put a chain back on a bike?
3. How to find the master link?
Conclusion